Welcome to my blog. Here you will find an irregular record of my haphazard progress through an eclectic mix of projects, games and other assorted wargames-related nonsense.


You came here looking for toast and tea? Pop in a couple of slices and put a brew on. This blog is best enjoyed with hot buttered toast and a mug of strong, hot tea*.


*Warning - may contain puns.


Showing posts with label Dark Age. Show all posts

Saturday, 28 December 2024

In The Beginning - Part 1: Knights & Vikings

If you ever listen to wargames podcasts where the host interviews a guest or luminary from the hobby, you'll be familiar with the obligatory opening question along the lines of "so tell me, how did you get into the hobby?" Queue that 'Bingo Card' moment while the guest reels off an often predictable list of influences, depending on their 'era' - Airfix, Featherstone, 40K, Warhammer, D&D, Commando Comics, Avalon Hill, etc.

As I listen along, oftentimes the answers resonate with my own wargaming origins. Probably one or more will resonate with you too. We wargamers of a certain vintage have a lot of shared heritage when it comes to beginnings and early influences. This got me thinking about my own wargaming journey, particularly those early years before I left childhood behind (though it could be argued I never really left it). Hence this, the first of what will inevitably be an irregular series of blog posts entitled 'In The Beginning', in which I touch upon some of my early influences. Unapologetically self-indulgent nostalgia for sure, so I can only hope that some of my shared memories may chime with you and trigger some of your own.


And so, In The Beginning...

Every wargamer's journey has to start somewhere. Mine started Christmas 1967.

That was when my parents gave me my very first toy soldiers - and not just soldiers, but a whole play set with figures, scenery, siege engines and equipment, and a castle too; Knights & Vikings, by Marx Toys.  

Here's what the box art looked like. Image credited to Collectors Weekly

Well, I was hooked. I've always had quite an active imagination and to this day, wargames with a strong narrative story-telling element are what attract me most. It is tempting to suppose that, at that tender age,  this play set fired that imagination and kindled a life-long love for our little world of toy soldiers.

Of course, I knew nothing of history then so the odd anachronism of Vikings vs Late Medieval knights in plate armour didn't register at all. Anyway, I've seen plenty of unhistorical match-ups (DBM and ADLG tournament players, I'm looking at you), so perhaps Marx were on to something after all. 

Best of all, it was a complete package; not so different from today's trend for 'everything you need to play is in the box', albeit without a set of rules - which is where that most important quality of play, imagination comes in. So, there were pre-painted figures (more on them later) multi-part plastic trees, rocks, a siege tower, ladders, barricades, and of course the castle. There was a paper play mat too, which my father had carefully taped to a large sheet of plywood for durability. He must also have spent time late in the evenings after work and after I had gone to bed, constructing the castle which came in several parts, plus the siege equipment and trees. My late father, bless him, was never a wargamer. Steam engines and Model Engineering was his thing, but he had a love of making things and I'm sure he would have gained a lot of enjoyment from putting the play set together. Some of that creative streak surely rubbed off on me, though little could he have guessed the hobby journey I was to later embark on. Thinking about my father now, I'm sure he will feature more than once in future posts in this series as there are a good few moments along the journey where his influence is felt.
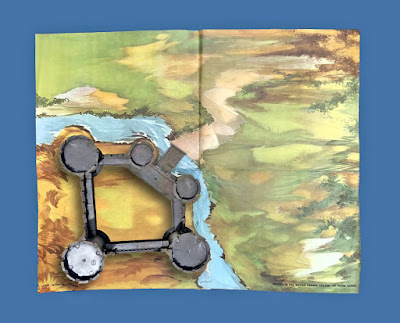
A mock-up of the paper game mat with the castle. Game mat image credited to Collectors Weekly

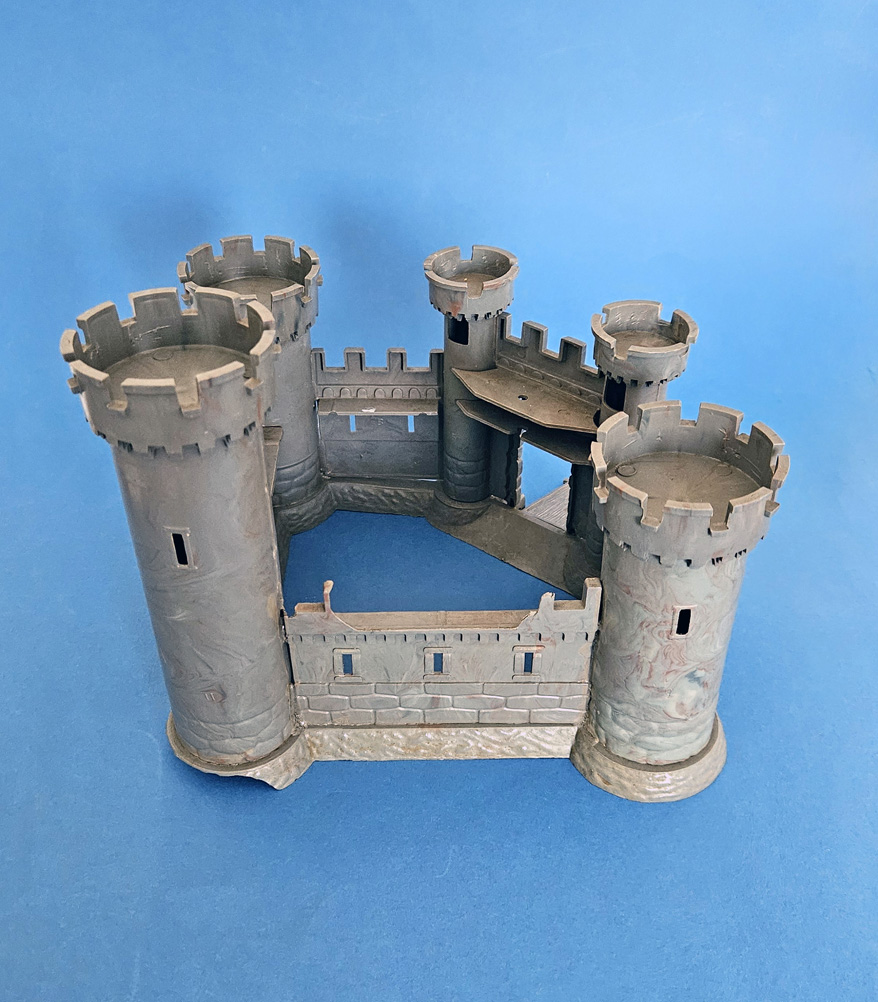
The most wonderful thing for me is that, over five and a half decades later, I still have at least part of that play set; a direct and tangible connection to my childhood. The castle is mostly intact. The winch and chains that once raised the drawbridge are missing and there are a few places where parts have broken off, but having survived many toy sieges and the passage of time it is in pretty good shape. I have just a few of the figures too, all rather battle-worn but still special to me. As for the rest, well the plastic rocks were first to go. Launched by overpowered elastic band catapults they would either fly over the castle or ricochet off it, well beyond the range of the play mat, where they were soon all swallowed by the carpet monster. As time passed, other components must have wandered off to the land of lost toys and the paper mat succumbed to wear and tear. Some of the knights and their mounts were no doubt accidentally crushed under foot while tilting at giants (everything was usually set out on the carpet in close proximity to my clumsy childhood feet) and some of the Vikings surely went to toy Valhalla under similar circumstances.  I think the plastic trees were most long-lived as I do remember that I used them, much later on, in other games. 

Given the passage of time, multiple changes of location and a succession of all the usual life events that go along with both childhood and adulthood, it is remarkable to me that any of this has survived at all and remained in my possession.

So, here is what is left.

First of all the castle, moulded in hard grey plastic. I always liked the design of the towers. As a child it always looked 'right' to me. I know it isn't historically perfect, but I still like the look of it.
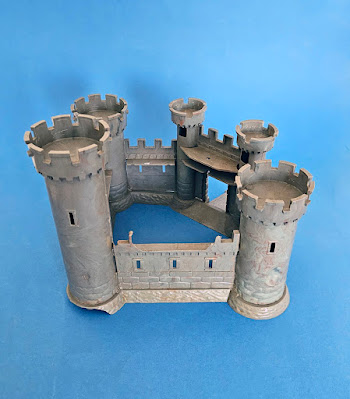

Battle damage clearly visible here.


And now the figures. Just four remain from the original 30-odd figures that came with the set; two 'knights' and two 'vikings'.


They are roughly 28mm, foot to eye and moulded in a single-colour hard plastic (silver for the knights, flesh for the vikings) over which the clothing colours and other details have been, (as the box art proudly proclaims), "hand decorated by artists". Due to the brittle nature of the plastic, thin parts such as weapons were very easily broken and lost long ago. So not particularly child-proof, but then Marx Toys probably didn't intend them to have much longevity given the fickle and short attention span of the average child when something newer and shinier comes along. Er, as a butterfly wargamer does this sound too familiar?

Lets have a closer look. First the Knights:


The chap on the left is an odd character. I remember that, even as a child, something struck me as a bit 'off' about his 'fencing' pose and fluted armour. I liked the archer on the right better. Perhaps it was the combination of silver and pale blue that I found attractive. That and the fact that the painter has managed to get his face right, so he has a bit more character. Something terrible has happened to his right elbow and his ankle is cracked, but he still manages to look the part. 

Now, the Vikings:


Our man on the left. Heck of a black eye you've got there Olaf! As a child I always thought this figure was wearing some sort of bright orange hood. It was only much later that I realised it was supposed to be his hair and beard. At least it matches the tunic of his friend on the right. Best we ignore the strange golden cone-shaped shield, and don't ask about the silver nipple protectors!

Jesting aside, I have a soft spot for these figures in all their quirkiness. Any oddness was invisible to my childhood eyes and my adult eyes are more than willing to overlook it, accepting them for what they are; toys. Here are some more pictures of them in their element, posing around the castle...

"Viking! What Viking?"

"Hey Olaf, 'ave you seen my hand?"

"Have at you, knave!"

If you have got this far, thank you for indulging my reminiscences. I hope that maybe they have triggered some of your own, perhaps even sending you off to search some dusty corner of your attic or garage for some long-neglected childhood toys. If I have succeeded in conjuring up the Ghost of Christmas past, I hope it smiles upon you benevolently.

Till next time...

Sunday, 3 June 2018

Saxon violence

Its not easy being a Thegn. Sure, you get some social status and privileges; maybe some land, better armour and equipment to strut around in and impress the pretty young mægdens. That sort of stuff. But its not all a big basket of rosy apples. Oh no indeed! First you have to suffer the attentions of some scalpel wielding modelling maniac intent on hacking away your fingers and wresting your spear from your grip. And now he's at it again, intent on pricking your pride with pin-sharp arrows. Oh the indignity!


Well, the Thegns are all painted and based, but I felt they needed a bit of battle damage. Not wishing to hack them about again, I thought the best way to represent this was by making them the target of a few arrows. But how to make them?

I wanted something wargames proof that would stand up to handling without snapping. That ruled out plastic rod or stretched sprue. Pins seemed the obvious choice, but I wanted the thinnest I could find to avoid my arrows looking more like scale javelins. After a bit of research, here's what I came up with; Prym super fine 0.4mm glass-headed pins made of flexible spring steel.


"These are really good" said the lady in my local haberdashers as I handed over my cash. No doubt she thought I was going to do a spot of hemming or quilting. I hadn't the heart to tell her I was going to chop them up to make tiny arrows.

It took a few attempts to get the fletchings right. These were made by cutting thin strips of 10 thou' (0.25mm) plasticard styrene sheet, which were then cut into shorter lengths and trimmed to shape. A thin layer of superglue was then applied to the shaft of the pin and each fletching carefully applied using fine tweezers. Once the glue had dried thoroughly, I ran another thin layer of glue along the seams of the fletchings for extra strength. To give each fletching a 'feathered' appearance, I drew a fresh scalpel blade across the edges several times to roughen them a bit.

Here's my first attempt. I found that the pins were long enough to cut in half to make two arrows. I wasn't entirely happy with the fletchings as they looked a bit too angular.


Here are a couple of later attempts, plus a broken arrow shaft, stuck in a blob of blu-tac to make them easier to handle for painting.


Once the arrows were painted, I chose some of the figures and drilled holes in their bases and shields; a task made easier by them being made of plastic rather than metal. After that, it was a simple matter of gluing the arrows in place...


…and here are the rest of the Thegns.


Well that concludes this little project. I'm pleased with the results and more so because it has got me back in to painting after a very long hiatus.

Okay, I'm off for toast and tea. See you next time!

Thursday, 24 May 2018

Saxon progress


A very quick post this time. The Saxons have been rather neglected of late as with the arrival of warm weather (finally) the great outdoors has beckoned and hobby related activities have taken a step back. Not that I haven't moved things on, albeit slowly. I've completed painting and basing most of the Saxons, so here are a few photos of a couple of finished figures. I'm quite happy with the end result. 


More coming soon...


Monday, 16 April 2018

A Gripping Saga (or mind your fingers lads!)

It's always a good idea to plan in advance - but that would spoil half the fun.

When I was putting together the plastic Thegns I didn't think much beyond getting them into some reasonable poses. I had noticed that the plastic spears were a bit on the chunky side and thought they'd be better with wire spears. Anyway, I could live with them the way they are - or so I thought. The trouble is, once the idea was formed I couldn't get it out of my head. Those plastic spears just had to go!

This would not have been a simple job even before starting construction. The spears are moulded as an integral part of the arms. Some are connected not only to the hands, but to the forearm with a thick block of plastic bridging the gap between spear and arm. This was going to require major surgery - and I was already well into painting the figures.

Deep breath. Armed with sprue cutters, pin drill and plenty of fresh scalpel blades I set to work. The first job was to clip off the spears neatly either side of the hands. This gave a nice flat surface into which I was able to drill a hole through each  hand. After that, it was simply (ha!) a matter of carefully trimming away the excess plastic around the hands and forearms. Fortunately as the figures are plastic, the clipping, drilling and trimming wasn't too painstaking. There were a few casualties; a severed thumb here, a sliced finger there. No - not mine! This required reconstructive surgery with Milliput to re-sculpt the missing digits and restore proper grip. I'm no sculptor, but I was reasonably happy with the result.

The miracle of Dark Age plastic surgery

The forearms on some of the figures were going to require similar post-op reconstructive treatment, re-priming and painting, but the damage was relatively minimal.


After surgery and re-arming with wire spears it was back to the painting queue for the Thegns...


...where they joined their more sensible (and thus uninjured) comrades who had eschewed spears in favour of swords.


Okay, so now I can stop agonising over the spears. Next time, I'll remember to fix them before construction. Now I come to think of it, I wonder if it was such a good idea to fix the shields on before painting? 


Monday, 2 April 2018

Coming out of the Dark Ages

A while back I picked up a few frames of Gripping Beast plastic Saxon Thegns off eBay. I'm not really sure why as I had no plan to build a Dark Age army. You know how it goes. Impulse purchase. I suppose if I have to justify it, I was a bit curious about plastic figures and their potential for customisation and wanted to find out what all the fuss was about. (Okay, I have a lot of catching up to do). This seemed a cheap way to find out and if I messed up completely it wouldn't hurt too much.

So, the figures arrived and were duly put away in the wargames cupboard where - you guessed it, they remained untouched for many a month.

Fast forward to the past month and I finally got around to putting some of the figures together. I know some wargamers find putting plastic figures together a trial of patience, but I found it rather therapeutic and relaxing. There's something about the smell of liquid polystyrene cement that wafted me right back to my childhood days of Airfix kits. (Serious note - inhaling the fumes isn't recommended. Bad for your health, right). Of course back when I was in short trousers the cement was stringy stuff out of a tube that oozed out of seams and joints, got all over your fingers and always made mess of clear aircraft canopies. We have progressed.  Yes, I could have used Cyanoacrylate 'Superglue' but it just doesn't have the same nostalgia and anyway, experimenting with repositioned heads and limbs is a pain with contact adhesive. And I hate sticking my own fingers together.


So, after a happy hour or so I had put together a dozen or so Thegns. Not the greatest sculpts. The poses are a bit limited, which did reduce my options a bit. Some of the faces tend to be slightly cartoony and detail is a bit soft in places but, hey they're perfectly acceptable for the price.

After basing and priming I got down to painting. Stay tuned. Progress reports to follow.