If you ever listen to wargames podcasts where the host interviews a guest or luminary from the hobby, you'll be familiar with the obligatory opening question along the lines of "so tell me, how did you get into the hobby?" Queue that 'Bingo Card' moment while the guest reels off an often predictable list of influences, depending on their 'era' - Airfix, Featherstone, 40K, Warhammer, D&D, Commando Comics, Avalon Hill, etc.
As I listen along, oftentimes the answers resonate with my own wargaming origins. Probably one or more will resonate with you too. We wargamers of a certain vintage have a lot of shared heritage when it comes to beginnings and early influences. This got me thinking about my own wargaming journey, particularly those early years before I left childhood behind (though it could be argued I never really left it). Hence this, the first of what will inevitably be an irregular series of blog posts entitled 'In The Beginning', in which I touch upon some of my early influences. Unapologetically self-indulgent nostalgia for sure, so I can only hope that some of my shared memories may chime with you and trigger some of your own.
And so, In The Beginning...
Every wargamer's journey has to start somewhere. Mine started Christmas 1967.
That was when my parents gave me my very first toy soldiers - and not just soldiers, but a whole play set with figures, scenery, siege engines and equipment, and a castle too; Knights & Vikings, by Marx Toys.
 |
| Here's what the box art looked like. Image credited to Collectors Weekly |
Well, I was hooked. I've always had quite an active imagination and to this day, wargames with a strong narrative story-telling element are what attract me most. It is tempting to suppose that, at that tender age, this play set fired that imagination and kindled a life-long love for our little world of toy soldiers.
Of course, I knew nothing of history then so the odd anachronism of Vikings vs Late Medieval knights in plate armour didn't register at all. Anyway, I've seen plenty of unhistorical match-ups (DBM and ADLG tournament players, I'm looking at you), so perhaps Marx were on to something after all.
Best of all, it was a complete package; not so different from today's trend for 'everything you need to play is in the box', albeit without a set of rules - which is where that most important quality of play, imagination comes in. So, there were pre-painted figures (more on them later) multi-part plastic trees, rocks, a siege tower, ladders, barricades, and of course the castle. There was a paper play mat too, which my father had carefully taped to a large sheet of plywood for durability. He must also have spent time late in the evenings after work and after I had gone to bed, constructing the castle which came in several parts, plus the siege equipment and trees. My late father, bless him, was never a wargamer. Steam engines and Model Engineering was his thing, but he had a love of making things and I'm sure he would have gained a lot of enjoyment from putting the play set together. Some of that creative streak surely rubbed off on me, though little could he have guessed the hobby journey I was to later embark on. Thinking about my father now, I'm sure he will feature more than once in future posts in this series as there are a good few moments along the journey where his influence is felt.
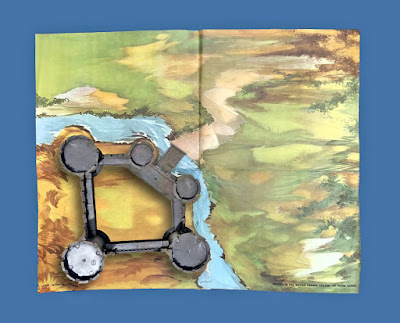 |
| A mock-up of the paper game mat with the castle. Game mat image credited to Collectors Weekly |
The most wonderful thing for me is that, over five and a half decades later, I still have at least part of that play set; a direct and tangible connection to my childhood. The castle is mostly intact. The winch and chains that once raised the drawbridge are missing and there are a few places where parts have broken off, but having survived many toy sieges and the passage of time it is in pretty good shape. I have just a few of the figures too, all rather battle-worn but still special to me. As for the rest, well the plastic rocks were first to go. Launched by overpowered elastic band catapults they would either fly over the castle or ricochet off it, well beyond the range of the play mat, where they were soon all swallowed by the carpet monster. As time passed, other components must have wandered off to the land of lost toys and the paper mat succumbed to wear and tear. Some of the knights and their mounts were no doubt accidentally crushed under foot while tilting at giants (everything was usually set out on the carpet in close proximity to my clumsy childhood feet) and some of the Vikings surely went to toy Valhalla under similar circumstances. I think the plastic trees were most long-lived as I do remember that I used them, much later on, in other games.
Given the passage of time, multiple changes of location and a succession of all the usual life events that go along with both childhood and adulthood, it is remarkable to me that any of this has survived at all and remained in my possession.
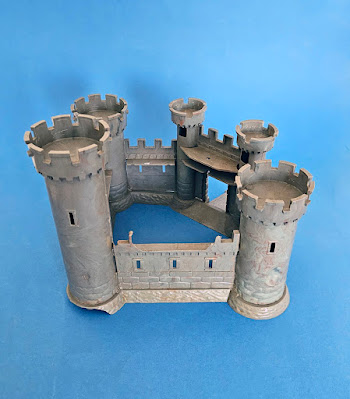
So, here is what is left.
First of all the castle, moulded in hard grey plastic. I always liked the design of the towers. As a child it always looked 'right' to me. I know it isn't historically perfect, but I still like the look of it.
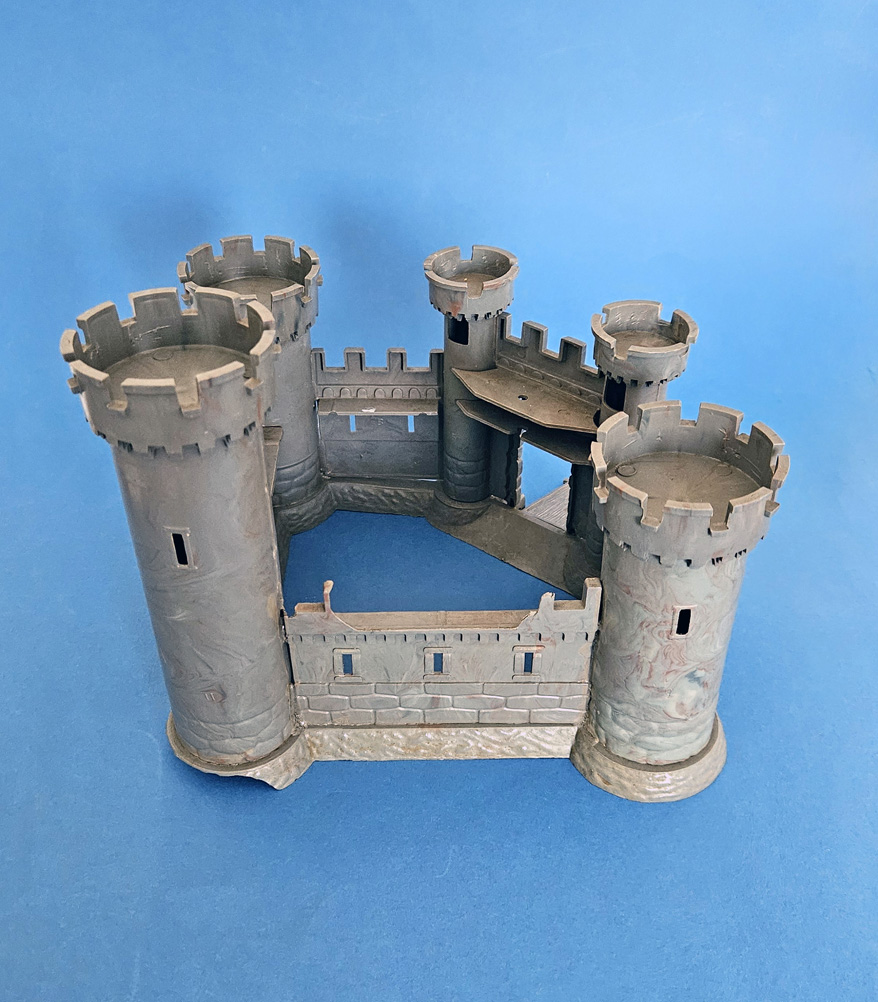
 |
| Battle damage clearly visible here. |
And now the figures. Just four remain from the original 30-odd figures that came with the set; two 'knights' and two 'vikings'.
They are roughly 28mm, foot to eye and moulded in a single-colour hard plastic (silver for the knights, flesh for the vikings) over which the clothing colours and other details have been, (as the box art proudly proclaims), "hand decorated by artists". Due to the brittle nature of the plastic, thin parts such as weapons were very easily broken and lost long ago. So not particularly child-proof, but then Marx Toys probably didn't intend them to have much longevity given the fickle and short attention span of the average child when something newer and shinier comes along. Er, as a butterfly wargamer does this sound too familiar?
Lets have a closer look. First the Knights:
The chap on the left is an odd character. I remember that, even as a child, something struck me as a bit 'off' about his 'fencing' pose and fluted armour. I liked the archer on the right better. Perhaps it was the combination of silver and pale blue that I found attractive. That and the fact that the painter has managed to get his face right, so he has a bit more character. Something terrible has happened to his right elbow and his ankle is cracked, but he still manages to look the part.
Now, the Vikings:
Our man on the left. Heck of a black eye you've got there Olaf! As a child I always thought this figure was wearing some sort of bright orange hood. It was only much later that I realised it was supposed to be his hair and beard. At least it matches the tunic of his friend on the right. Best we ignore the strange golden cone-shaped shield, and don't ask about the silver nipple protectors!
Jesting aside, I have a soft spot for these figures in all their quirkiness. Any oddness was invisible to my childhood eyes and my adult eyes are more than willing to overlook it, accepting them for what they are; toys. Here are some more pictures of them in their element, posing around the castle...


.jpg)


